August may be National Wellness Month, but practicing wellness throughout the year benefits you physically and mentally. And with all the craziness of life, your home should be the one place where you can reset and relax. Use these simple tips and tricks to turn your home into a wellness haven (even if it’s not.)
Clean Home, Clean Mind
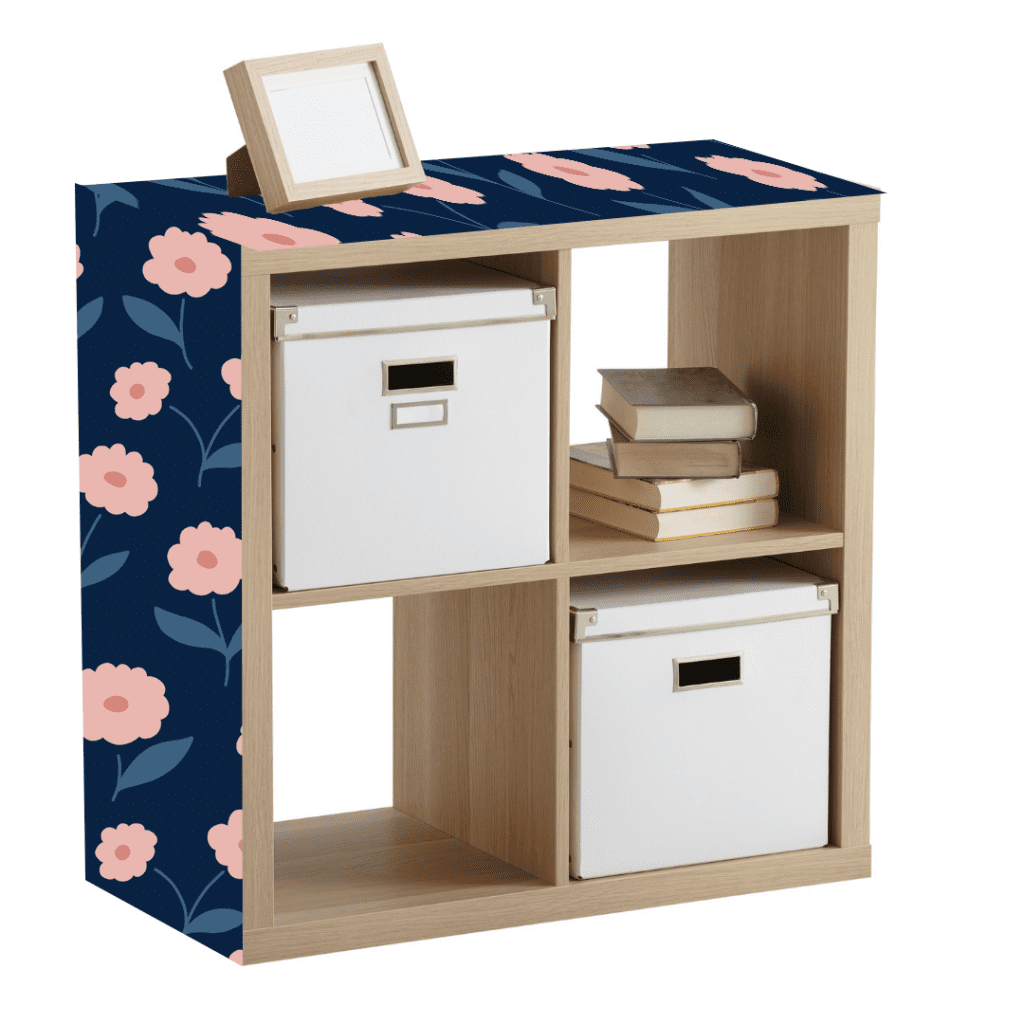
Have you ever felt at ease in a space with stuff piled everywhere? Probably not. The cleanliness and organization of a room has a larger impact on our wellbeing than we might realize. Cleaning and decluttering your home is the first step to improving your living space. Focus on tackling the most used areas of your home and obvious signs of grime. Declutter by donating or tossing items you don’t need or use frequently—don’t keep things that no longer serve you. Use storage systems to help you maintain organization. Institute daily habits that encourage organization and cleanliness, like leaving shoes by the entryway, hanging up coats on a rack, cleaning up messes as they happen, and always putting things in their proper place. If you have young kids or pets, give them storage containers where they can put their toys.
Zen Aesthetic
Pop of Color Psychology
The color of your walls can strongly influence your mood and even behavior. Giving your home a paint update is a simple way to create a peaceful environment, particularly for bedrooms and bathrooms. Classic soothing paint choices include shades of blue, off-white, light neutrals, earth tones, and light tints of other colors. Avoid very vivid or very dark colors as they may make you more prone to excitement or gloominess.
Pieces of You
Making your home feel more retreat-like doesn’t mean your home should be devoid of your personal touch! Enhance your space with a few decorative pieces that make you happy. These could include an art piece, framed family photos, or a cool knickknack. Be cautious not to add too many or it can have the opposite effect.
Plant Happy
Having houseplants in your home isn’t just trendy and aesthetically pleasing, it has wellness benefits, too! Incorporating touches of nature in the home can boost calmness, creativity, mood, productivity, and improve indoor air quality. Consider placing a few plants around your home, like in your living room, bedroom, or bathroom. No green thumb? No problem! You can reap the benefits of biophilic design with faux plants, nature artwork, or decor made from natural materials.
Good Vibes Only
Setting the mood isn’t just for the movies or date night, it contributes to your home’s atmosphere and how cozy it feels. Engage multiple senses with scents, sounds, and lighting that lend to a more comforting ambience. When choosing light bulbs, pay attention to the temperature and lumen levels. Temperature refers to how warm (more yellow) or cool (more blue) the light is, and lumens refer to how intense the light is. For the rooms where you unwind the most, choose lights with temperatures between 2200-2700K to give off a soft, white glow. The larger the room is, the more lumens you may need to adequately light the area. You can also install dimmer switches or use smart lighting to easily control a room’s brightness. For bedrooms, consider using light blocking blinds to enhance your sleep.
Scent is a powerful tool that can put you in the right state of mind. Use scented candles, air fresheners, or fragrance diffusers to jumpstart rejuvenation. Lavender, eucalyptus, sage, and chamomile are popular calming choices. When you’re taking time to decompress or prepare for bedtime, try playing soothing sounds through a speaker to help ground you. Many people enjoy falling asleep to sounds of the ocean, rain, forests, and white noise.
Although we can’t control every stressor in life, your home should be a place that fosters reflection and rejuvenation. When you create the optimal environment for relaxation, you’ll be well on your way to truly feeling relaxed. m
If you have any questions about the home buying process, contact one of our licensed Mortgage Loan Originators. If you are ready to buy a home, click here to get started!
Flooring is anything but boring! The type of flooring you choose for your home contributes to your home’s aesthetic and comfort—it shouldn’t be an afterthought! If you’re debating what flooring you should use in your home, read up on these different types of flooring.
Carpet
Not a fan of having to walk on cold, hard floors? Carpeted floors are what you want! Carpets come in a rainbow of colors to coordinate with your decor, as well as various textures and densities. Common carpet types include loop pile, plush pile, frieze, Berber, and twist pile. Aside from aesthetics, the carpet’s characteristics impact its durability and care. Padding is placed under carpet during installation; choose carefully, as the padding affects the carpet’s longevity and your walking comfort. Many brands offer stain resistant carpeting, but clean up messes as soon as possible to prevent permanent stains or smells. Regular vacuuming is sufficient for regular cleaning, but have your carpets deep cleaned once a year to remove embedded dirt. Carpeting often ranges from .65 cents-$12 per square inch, making it a very affordable choice.
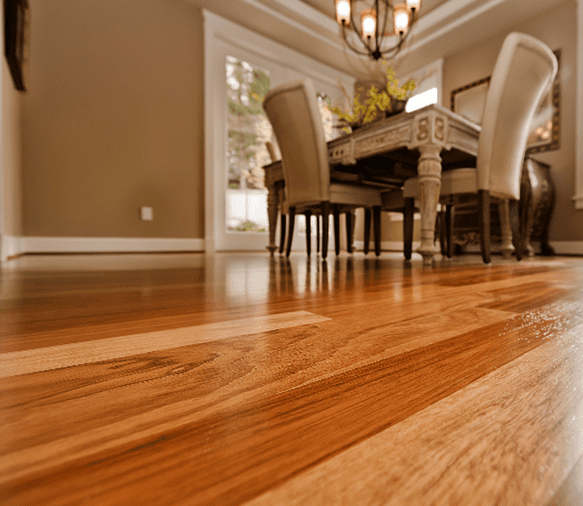
Standard and Engineered Hardwood
Hardwood has an irreplaceable warmth and feel—it’s a true classic! Being made of solid wood, hardwood handles foot traffic well and can be refinished multiple times. With proper care, it can last generations. Be sure to dry dust regularly, use wood floor-friendly cleaning products, and dry well afterwards. Moisture doesn’t play well with hardwood, so avoid installing it in bathrooms and kitchens, and wipe up spills quickly. Hardwood tends to cost around $6-18 per square foot with installation, though engineered hardwood can be a good alternative.
Engineered hardwood is composed of several thin layers of wood, topped with a veneer of real hardwood. This gives you the hard-to-replicate look and feel of hardwood. If the veneer is thick enough, it can be refinished 1-2 times during its lifetime. This flooring type typically ranges from $3-11 per square foot but can be more depending on the quality. Sweep floors clean or use products designed for engineered floors. Like hardwood and laminate, don’t let water sit on the surface for long or install in humid areas.
Vinyl
For homeowners looking for durable, low-maintenance flooring that’s easy to maintain, vinyl is an excellent choice. Vinyl can be made to look like other materials, and it works well in high traffic areas or in high moisture areas. The most common forms of vinyl flooring are sheet, tile, and plank. Vinyl sheets and tiles need to be glued to the floor’s underlayment, but planks can snap together to be laid over the existing floor. Vinyl floors are either waterproof or water resistant, making cleaning a breeze. The price per square foot ranges from .50 cents to $10, depending on the type and quality. Keep in mind that vinyl isn’t the most eco-friendly option since it’s synthetic, and removing glued-on flooring is difficult.
Stone and Ceramic Tile
Stone and ceramic tile floors add a touch of sophistication to your home and can last for decades with the right care. Popular types of stone flooring include marble, granite, limestone, and slate. It’s compatible with every room in your home and handles foot traffic well. Because stone is porous, the surface needs to be sealed to prevent water damage. Depending on the material and location, resealing should be done every 18 months or 3-4 years. Bathroom and kitchen floors may need to be resealed more often due humidity levels. To preserve the stone’s unique characteristics and finish, use mild, non-abrasive cleaning products and clean up messes quickly. Stone is among the pricier flooring types; expect to pay $8-40 per square foot.
Ceramic and porcelain floors are available in many shapes, colors, and patterns to give your home flair. Both materials work well in damp areas, are hygienic, and quite durable against scratches. Though they’re sturdy, they aren’t immune to damage. Tiles can crack if something extremely heavy falls on them and may chip at corners. Basic cleaning can be done with a mild solution, though it’s a good idea to scrub any grout lines every so often to prevent dinginess. While the tiles themselves don’t require sealing (most come glazed), cement-based grout should be sealed to protect the integrity of your flooring. Ceramic tiles start around $1-6 per square foot, and porcelain is about $3-9. Be aware that flooring and installation costs will be higher if you’re using nonstandard tile shapes or want an intricate layout.
Laminate
Laminate floors are a cheaper alternative to hardwood floors and feature a printed veneer over a wood composite base. At around $3-8 per square foot, it’s a great option if you want the look of hardwood on a budget. You can even install it yourself! Laminate flooring has come a long way and is more durable than in the past. When shopping for laminate, pay attention to its abrasion criteria (AC) rating. The AC rating shows how durable it is in relation to how much foot traffic it will receive. Avoid installing in areas with high humidity, as the floor can warp. Caring for laminate requires care and vigilance; never clean with a wet mop or let liquids sit too long on the surface, as it can damage the floor. Instead, use a broom or a laminate-friendly cleaning solution to maintain it.
Flooring has come a long way to make our homes more attractive and complementary to our lives. When shopping for flooring, always keep your budget, lifestyle, home aesthetic, and the installation area in mind. Be sure to take home samples to compare quality. Well-chosen flooring is sure to enhance your home and make you love it even more!
If you have any questions about the home buying process, contact one of our licensed Mortgage Loan Originators. If you are ready to begin the home buying process, click here to get started!
Summer is the quintessential season to take a vacation, but if you’ve had to make household budget cuts recently, you may have to make the difficult decision of pausing or minimizing your plans. Staying closer to home this summer might just be the next best thing to having a relaxing getaway. Sure, maybe your home isn’t exactly like a vacation resort, but it certainly doesn’t have to feel like the same old, same old—here’s how you can make the most of your staycation.
Inside Your Home
Cleaning your home may sound like the opposite of relaxing, but how would you feel entering a dirty, unkempt hotel room? Probably not very relaxed, right? Before you start your staycation, treat your home to some vacuuming, wiping down, window washing, and basic decluttering. Straightening up your home is more than just freeing up space, it frees your mind, too. With clean windows, you can let the sunshine in or even a gentle breeze. Starting your time off with a clean home means you’ll spend less time worrying about how much housework you have to do
Are you missing the foliage of a tropical paradise? Place a few real or faux plants around your home to mimic the lush jungle. Scent is a powerful tool that can mentally transport you; use it to your advantage by using cleaning products, fragrance diffusers, or air fresheners that evoke tranquility.
In your bedroom, consider using blackout curtains to emulate being in a hotel room—they may even help you sleep more soundly! Make it a point to make your bed each morning. After a long day of fun, it feels great to unwind in a freshly made bed. To make your bathroom feel more spa-like, replace your everyday towel set with fluffy white ones.
When you’re taking a staycation, treat it like you would a conventional vacation. Don’t worry about doing daily chores or checking work emails constantly. Changing your ordinary behavior will mentally make you feel like you’re taking a vacation, even if you’re staying near home.
In Your Backyard
Use your backyard to create summer memories during your staycation. A simple way to get into the “chill zone” is to hang an inexpensive hammock in your yard. Try bringing the activies you’d normally enjoy inside outdoors, like mealtime, reading, board games, and watching movies. For the more adventurous, break out your tent and sleeping bags for a backyard campout under the stars. It’s a classic way to enjoy the outdoors, no matter your age. A string of solar powered lights can make your space more magical whenever you’re using your yard in the evening.

Outside Your Home
You don’t have to go far to have an entertaining vacation. Staying closer to home means you’ll get to appreciate your town more. Why not take a day trip to check out new and old favorite activities and restaurants? Pretending you’re a tourist in your own city can lend itself to fresh, different experiences. You can make kayaking, hiking, biking or swimming a full-day excursion if you love being active outdoors. If a laid-back experience is more your speed, a picnic in a public park or beach can make the day more special. Many areas host free or low-cost events during the summer—find out what’s going on in your community and start making plans!
If you want your summer plans to involve fewer traffic jams and cancelled flights and more fun memories, staycationing is an excellent, cost-effective alternative. Even if you’re not leaving your ZIP code, a staycation doesn’t have to be “blah”; it just means seeing the familiar with a new perspective.
If you have questions about becoming a homeowner, contact one of our licensed Mortgage Loan Originators. If you’re ready to begin the home buying process, click here to get started!
Getting to choose the ideal furniture and décor for your home is part of what makes being a homeowner rewarding, but it can also be a strain if your finances are tight. Read on to learn some helpful tips on how to furnish your home on a budget.
Budget
First and foremost, review your household budget to determine how much you can safely spend on home goods throughout the year. After you know your spending limit, consider what furniture you want to add or replace and prioritize by need. By starting with what you use most often, you can be sure you’ll get your money’s worth out of whatever you purchase. You may feel a desire to add or replace for every room in your home at once, but you shouldn’t feel like you’re in a race. Instead, gradually update each room according to need once you have the extra funds. Another way to save is to mix and match your home collection with a combination of lower-end and mid-priced items. It’s a smart move to invest in one or two sturdy pieces that you’ll use daily, while buying cheaper furniture for things that will get less wear, like a bookcase. Though price isn’t always synonymous with quality, avoid paying for poorly made furniture for daily essentials, unless you’re okay with replacing them within a shorter timeframe.
Shop Smart
Who doesn’t love a great deal? Keeping tabs on upcoming furniture sales online and in-store will give you more opportunities for furnishing your home on the cheap. Stores tend to have the best sales in January, July, and on holiday weekends. For outdoor furniture, try checking in late summer and early fall. Thrift shops, consignment stores, and yard sales can be a gold mine for unique, gently used pieces at an affordable price! Online marketplaces such as Facebook Marketplace and Craigslist are also a handy resource for finding bargains, just take precautions to protect your money and yourself. In addition to being a savvy shopper, consider the versatility of what you purchase. Furniture with built-in storage can be an excellent value, as they save space and serve multiple functions.
Get Creative
You can breathe new life into your furniture, both existing and thrifted, by channeling your inner artist! Giving your items the DIY treatment is a stellar solution to salvage pieces that are still structurally sound but could use some aesthetic changes. For furniture with solid wood components, consider painting or refinishing them. A refinishing or repainting project is perfect for beginners; simply strip any existing coating, sand, prime, paint/stain, and seal. You can even paint over composite wood, plastic, and metal pieces, just be sure to prep them accordingly and use a paint that’s suitable for the material and intended purpose. Another way to add a pop of personality to your décor is to use removable wallpaper on the solid portions of your furniture. For example, try jazzing up a drawer face or shelf backing with a fun pattern, and finish with some new hardware. This method is even easier than repainting and is non-permanent. You don’t need upholstery skills to make your fabric furniture pop; simply give them a cleaning and add some inexpensive throw pillows and an area rug to tie the room together.
Even if you find you have little room to go on a furniture shopping spree, you can still spruce your home while saving money! By prioritizing, being wise with your money, and resourceful with what you have, you can assemble a one-of-a-kind collection that fits your style and your budget.
If you have questions about buying a home, contact one of our licensed Mortgage Loan Originators. If you’re ready to begin the home buying process, click here to get started!
Not everyone enjoys doing laundry, but having the right washer and dryer for your needs can make it less of a chore, and maybe even enjoyable! When you’re shopping for a new washer and dryer, use this guide to help find the ideal combo for you.
Factors to Consider
Size – Always measure the space of your laundry area and compare it to the dimensions of the appliances before buying. Measuring the doorways leading into the space is also a wise idea. If you go with a vented dryer, you will need sufficient space behind the unit to run a ventilation duct.
Price – The cost of a washing machine and dryer can run from several hundred dollars to over one thousand per unit. Consider the model’s energy rating, as it can save you money over time.
Lifestyle– Think about how often you do laundry and how large your average load is. For example, if you do multiple washes each week, pick models with a large capacity and a quicker drying time.
Washers
Top Load
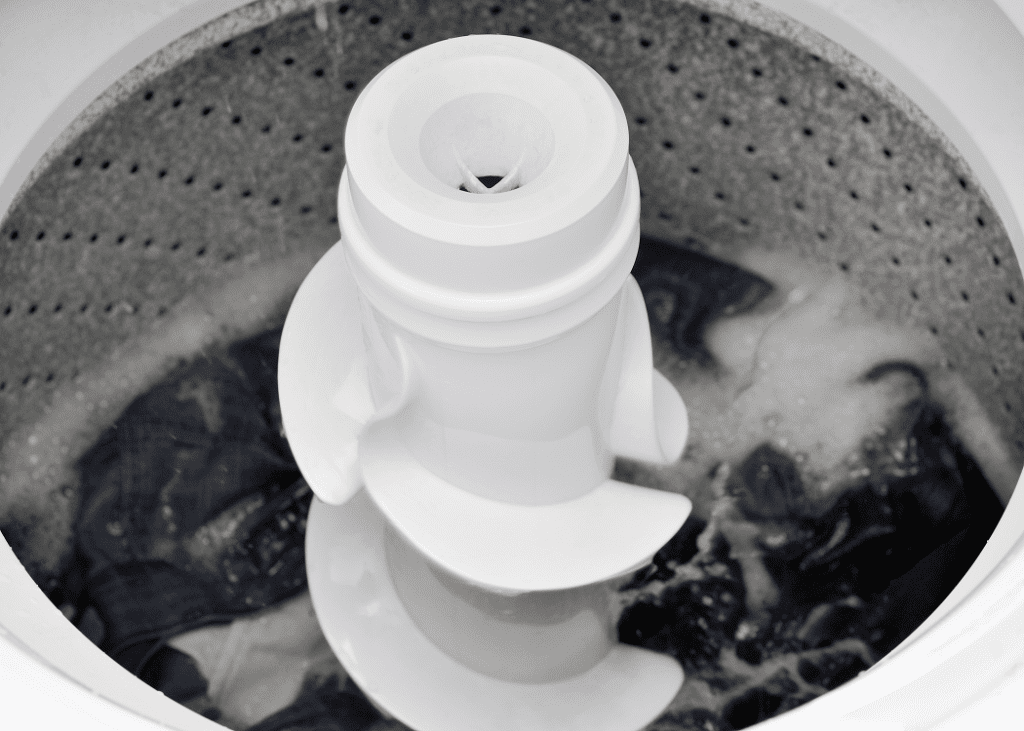
Top loading washing machines are one of the most common types of washing machines and tend to be more affordable. Like the name suggests, the loading door is on top. Traditional top load washers have an agitator inside the washing drum, which whips the clothes around it to clean them. This method is effective for removing dirt and stains, but it can be rough on your clothing. Alternatively, high efficiency (HE) top loading machines have an impeller unit. The bottom of the drum has a wash plate that spins at a very high speed to distribute water throughout the load. This type of cleaning is gentler on your laundry and is more eco-friendly than its agitator counterpart. Although top loading washers can’t be stacked on another unit, you can purchase a laundry center if you’re short on horizontal space but have plenty of vertical room. These units have a washer on the bottom and a dryer on the top, ideal for compact homes.
Front Load
Front loading machines are the second main kind of washing machines available. These trendy machines are loaded from the front and feature a porthole door. With front load washers, there is no agitator; the spinning action of the washing drum gets the items clean when they’re rubbed against each other during the cycle. This process is gentle on clothes and more eco-friendly since it uses less water than a top load washer. There is more versatility with this type of washer because you can place it next to the dryer or stack the dryer on top to save space. Keep in mind that front loading washers may be more susceptible to leaking and mold. Since they use less water, it may be difficult clean very smelly or stained clothes. Although these washing machines tend to be more expensive, they could be cost effective if you do many loads of laundry.
Dryers
Vented
With a vented dryer, a heating element heats up air, which is blown by a fan into the tumbler to dry your clothes. The hot air is expelled through a vent to the outside of your home. This traditional type of dryer is more budget-friendly and will dry your clothes in a short amount of time. It’s important to clean the vent once a year to avoid a fire risk.

Ventless
Ventless dryers don’t have an external vent, they recirculate the heat back into the machine using either a heat pump or through a condensation method. A heat pump dryer simply reuses air by passing it through a compressor to reheat it and return to the tumbler. A condenser dryer takes the old hot air, cools it using a condenser, and reheats it again. The water that accumulates from this process can either drip out a duct connected to your plumbing or collect in a reservoir drawer on the machine. Ventless dryers use significantly less energy than vented dryers, making them more energy efficient, but they typically have a higher upfront cost. It’s critical to change the lint filters with ventless dryers every time since the air needs to flow freely into the main chamber. Since the machine goes through a recirculating process, it may take slightly longer to dry your clothes.
Your washer and dryer are just as essential as any other major appliance in your home, and it’s important to understand what features you need in your next model to best serve your needs. With so many options on the market, you’re sure to find the perfect pair to add to your home.
If you have questions about buying a home, contact one of our licensed Mortgage Loan Originators. If you’re ready to begin the home buying process, click here to get started!
Think about how often you have to water, weed, and mow your lawn to keep it looking its best. Even if you’re able to get the results you want, it can be tedious to constantly maintain it. Xeriscaping can be a fantastic alternative to conventional lawncare, while saving you time and resources. If you’re ready to move to a more sustainable lawn, learn how you can transform your yard with xeriscape gardening.
What is Xeriscaping?
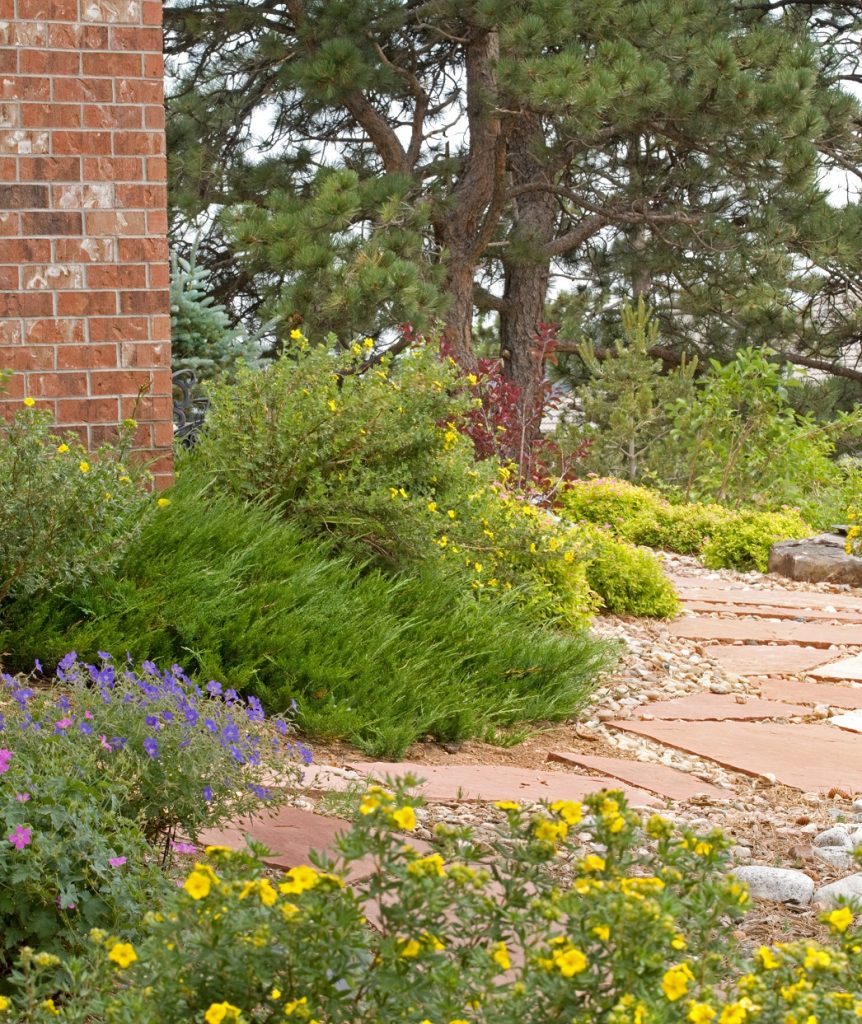
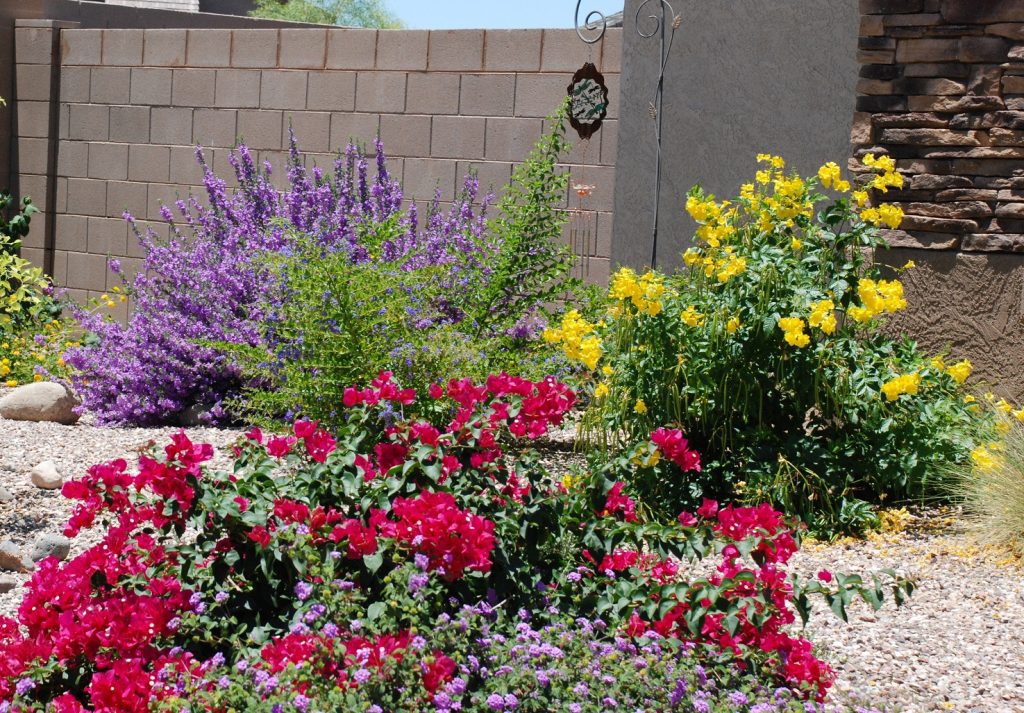
Xeriscaping (pronounced “zer-i-scaping”) is a type of gardening that emphasizes water conservation and easy upkeep by using drought-resistant plants and strategic planting. The concept behind xeriscaping is to have a garden with fewer watering needs that will survive during drier weather and be more eco-friendly. In addition to saving water, xeriscaping reduces need for pesticides due to mulch or gravel use. Even though xeriscape gardening is ideal for dry environments, it can work in any climate and can be as lush or minimalist as you want.
Plan Your Garden
Before you trade your current garden for a xeriscaped one, map out the current features of your yard. Be sure to note the natural sunlight patterns of your property and how sloped or flat a given section is. Knowing the characteristics of your yard will allow you to create irrigation zones to optimize your water usage. A good rule of thumb when planning your xeriscape garden is to place thirstier plants closer to your home and xeric (dry) plants further away from it. Feel free to xeriscape your whole yard if you’re ready to be rid of turf, or convert a portion of your garden if you want to keep some of your lawn. For the portions that will be replaced, remove any existing grass and sterilize the soil by carefully pouring boiling water on the area. It’s also recommended to perform a soil test before planting so you know the pH level and can make any adjustments to make it better for growing. Once you have made any amendments to your soil, mix in compost for added nutrients.
What to Plant
Even though xeriscaping is perfect for desert areas, it doesn’t mean you’re limited to growing cacti in your yard (unless you want to, of course!). There are many drought-resistant and drought-tolerant plants that can add color, texture, and variation to your garden. When possible, try including native species to support the local ecology and to make maintenance even easier.
Some grass that you can use in your garden are fountain grass, buffalo grass, Bermuda grass, pink muhlygrass, and blue gamma grass. For plants, consider sage, eastern juniper, and palo verde. Succulents like aloe, agave, and chicks and hens are also a safe bet to add to your yard. There’s no shortage of xeriscape-friendly flowers to choose from—you might be surprised to find your favorites are perfect for this type of gardening! Some great picks include sunflowers, lavender, black-eyed Susan, coneflower, red spider lily, purple poppy flower, cosmos, California tree poppy, and oleander.
When you’ve chosen what you want to grow, categorize them by sunlight and hydration needs. This will help you determine where each species should go based on the irrigation zones you identified earlier.
Set Up and Care
It’s finally time to start planting! Place your plantings around your property, following your irrigation zones as you go. When everything is in the ground, cover any exposed soil with a generous layer of mulch or gravel. Adding a top layer is an essential part of xeriscaping, as it insulates the plant from temperature changes and inhibits weeds from invading your garden. Natural mulch also provides the benefit of adding nutrients to the soil as it breaks down. One of the selling points of a xeriscaped garden is that it’s relatively low maintenance compared to a traditional lawn, but that doesn’t mean it’s maintenance free. As your garden thrives, remove any weeds you see and prune plants as needed to promote growth. Though many of your plants can survive without frequent sprinkling, you will need to water them more often when they are newly planted. You can water them once a week or once every two weeks once they mature, but always refer to the needs of your irrigation zones. When you do water your garden, try to direct the stream close to the base of the plant to maximize water usage.
Although creating a xeriscaped garden takes some careful preparation, it can be well worth it when you find how much time and water you’re saving maintaining your yard. When less of your week is spent tending to your garden, the more you’ll be able to enjoy its beauty.
If you have any questions about the home buying process, contact one of our licensed Mortgage Loan Originators. If you are ready to begin the home buying process, click here to get started!
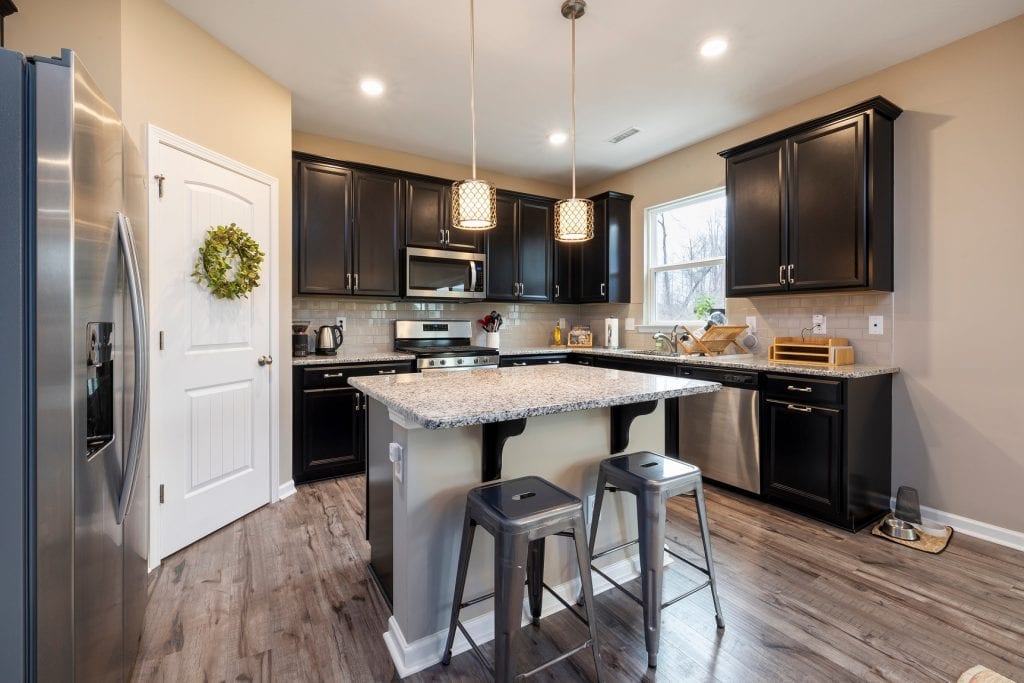
If you’ve spent the past several months binging home makeover shows and getting kitchen envy, you’re not alone. You might think that you need to rip out everything in your kitchen and buy all-new everything to get the same effect, but that’s not necessarily true. Get ready to be inspired with these five simple ways to upgrade your kitchen.
Walls
Repainting your walls is one of the simplest and most affordable ways to alter the appearance of your kitchen. It can dramatically change how the area looks even if you don’t change anything else. You can have all the walls be the same color or make one panel an accent wall in a different shade. If you prefer patterns on your wall, opt for removeable wallpaper to customize your kitchen. Unlike traditional wallpaper, removeable wallpaper won’t ruin your walls and gives you the flexibility to change your décor style easily. To give your kitchen a sense of whimsy, try painting a section of your walls with chalkboard paint to create a to-do board or a kid’s drawing area. Another easy way to add visual interest to your kitchen is to install a backsplash. You don’t have to limit yourself to using ceramic tile—you can use vinyl peel and stick tiles, metal ceiling tiles, wallpaper stickers, or even faux wood paneling.
Flooring
The kitchen is one of the busiest places in your home, so wear and tear can be more noticeable. When your floor is looking dull and worn out, it may be time to get it replaced or restored. When it comes to replacing your kitchen floors, don’t overlook linoleum or vinyl. Both come in a variety of styles, are low maintenance, and tend to be more affordable option. Hardwood floors are always a classic look, but they can be more expensive to replace than other flooring types. Instead of going full a full replacement, get your floors refinished instead. Refinishing involves sanding down, re-staining, and varnishing the floor, making it appear like new. You can hire a contractor to do the work, but it can be a DIY project, too.
Cabinets
The first thing you might notice when walking into a kitchen are the cabinets. While you could replace all the cabinetry, revamping it can be more cost effective. Use paint to instantly transform your kitchen to fit your style. Should you choose to paint your wood cabinets, be sure to sand, and prime the area before applying paint. Much like the concept of refurbishing hardwood floors, you could choose to have your cabinets refinished if you don’t want to paint over them. This process is more of an investment than simply adding a coat of paint, but it may be cheaper than getting new cabinets and preserves the natural wood grain. If you’re tired of dealing with cabinet doors altogether, you might just want to remove them! Open shelving can give your kitchen a more modern aesthetic and provides the perfect way to showcase a dishware collection. You can even remove one door panel if you don’t want to commit to completely open shelves. Another way to revamp your kitchen in a subtle way is to replace the fixtures on your cabinets and sink. Choosing the right hardware can really elevate your kitchen and is the perfect finishing touch for your well-loved space.
Counter
With all the activity that goes on in the kitchen, your counters can take a beating. Luckily, you can breathe life back into them without a full replacement! Countertop transformation kits are an affordable and viable option no matter what your counters are made of. Using the special paint, stone chips, and varnish that come with the kit, you can create a top layer on your counter that mimics the appearance of quartz or granite. If you’d rather have an actual stone surface for your counter, look into counter overlays. Stone overlays are thin slabs of quartz that cover your existing counters. As long as your counters are in good shape and can support additional weight, you can put an overlay on them. Counter overlays can provide the luxe look and durability of stone without the hefty price tag.
Lighting
When you’re decorating a room, you might not give much thought to how lighting can affect the mood. Instead of treating it as an afterthought, use the power of lighting give your kitchen center stage. If you want the lighting to be a focal point in your kitchen, use a pendant lamp (or several small ones) to highlight your counter. Track lighting is another great option that allows you to move and angle smaller lights to focus illumination where it’s needed. Keep in mind that the color temperature of the lightbulbs will also affect the mood of your kitchen. In addition to standard overhead lighting, consider adding brightness to under your cabinets for a sleek aesthetic. You can use LED strip or puck lighting that mount onto the cabinet with minimal installation.
The kitchen is often called “the heart of the home”, and for good reason. It’s not just a place to cook meals—it’s a place to gather and make memories. Beautifying your kitchen will take some elbow grease and plenty of creativity, but by no means does it have to be difficult or overly pricey.
If you have any questions about the home buying process, contact one of our licensed Mortgage Loan Originators. If you are ready to begin the home buying process, click here to get started!
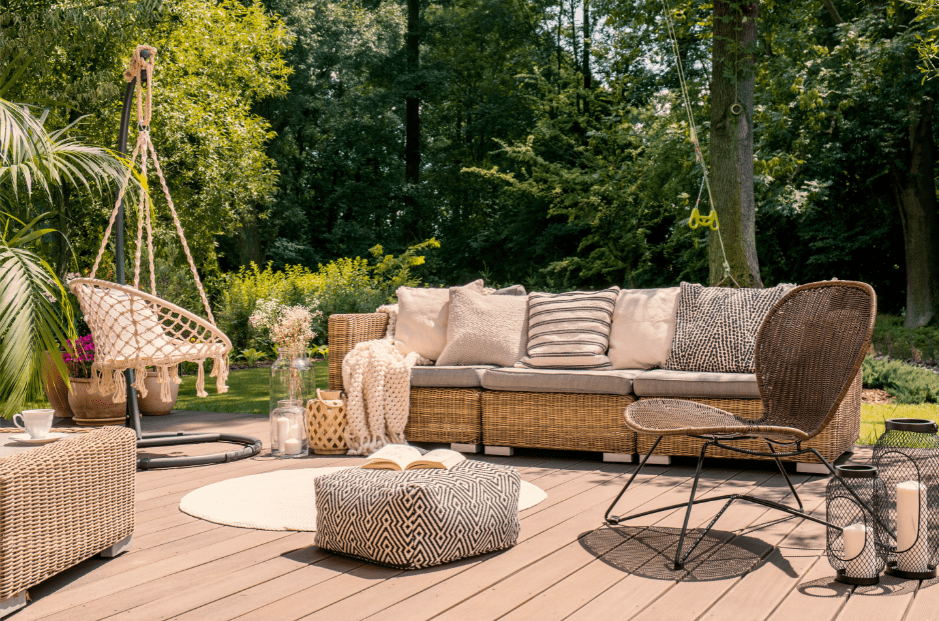
During the warmer months, you can’t help but want to take advantage of the pleasant weather! Instead of cooping up indoors, why not enjoy the fresh air by hanging out in your very own outdoor space? An outdoor space expands your options for relaxing and entertaining; after all, your yard is an extension of your home. Here’s how you can create an outdoor space in your backyard.
Building the Space
First, decide where you want to set up your outdoor space. Don’t worry if your yard has limited square footage, you can still design a modest gathering area that’s cozy and welcoming. If your home already has a patio, deck or back porch, congratulations—you’re already halfway there to creating your oasis! Before you start revamping the area, make sure everything is in good condition and relatively clean. Make any structural or aesthetic fixes until you’re happy with the base platform.
If you want to put your gathering space in your yard, think about where and how large you want the finished product to be. Be sure to consider elements like privacy level and surrounding shade when choosing the location. For example, if you want to add a firepit, you wouldn’t want to put it where there are trees directly above you. Once you’ve decided the location and size of your hideaway, define the area with gravel or brick pavers. Defining the area will help your outdoor space feel more like a retreat and less like you just put some chairs in your backyard. You can call a contractor to hardscape the zone, or you can do it yourself if you’re up to a challenge. Going the DIY route will involve digging, so make sure you call the national “Call Before You Dig” hotline ahead of time to ensure you don’t accidentally hit anything important. You can also add a pathway to your outdoor space with bricks or steppingstones.
Outdoor Furnishings
Now that your location is prepped, it’s time to add some furniture! Consider what pieces you want to include—there are many styles of sofas, chairs, and tables suitable for outdoor use. Some of the most popular materials for outdoor furniture include metal, wicker, plastic, and wood. Metal is sturdy and less likely to blow away; choose models with a powdered finish for longevity. Wicker is great for a coastal aesthetic; opt for all-weather wicker pieces. Plastic furniture is light, easy to clean, and usually cheaper than other materials. Wood is a classic, natural choice, but it will require extra care to prevent rotting and fading. You can further customize your outdoor space with attractive seat cushions and decorative pillows. If you want to enjoy the warmth of a firepit in your outdoor space, make sure it isn’t directly sitting on flammable material, too close to vegetation, or in an enclosed space (i.e., a covered porch).
Finishing Touches
To make your outdoor space feel even more calming, add some extra homelike touches. Much like the rooms inside your home, an area rug can make a space more cohesive. Before placing any furniture, find an outdoor rug that complements your chosen seating. Consider adding a few potted flowers or flower beds around your relaxation grotto to add natural beauty. Lastly, you can create a magical ambience with some solar powered string lights! Hang a strand or two around the perimeter to make evening usage more pleasant and Instagram-worthy.
Building an attractive and functional outdoor space can enhance your home and make summers more enjoyable. You’ll find that winding down is even better when all you need to do is step into your backyard.
If you have any questions about the home buying process, contact one of our licensed Mortgage Loan Originators. If you are ready to begin the home buying process, click here to get started!
Protecting the environment is a huge task, but you don’t need to move to a wind farm to make your home eco-friendly! Every day actions add up and can make a difference. There are many easy ways that you can reduce your environmental impact, even without making radical changes to your lifestyle. Here are 6 ways to make your home more sustainable
It’s nearly impossible to live in the modern world without using energy of some sort, but it’s certainly possible to make more energy efficient choices in your home. Take advantage of sunny days by minimizing your use of indoor lights and make it a habit to turn on your lights only when you need them. The sun brightens up a room unlike anything else—and it’s free! Speaking of lighting, swap out your incandescent lightbulbs for LED bulbs. LED lights can last around 50,000 hours and use 75% less energy than incandescent lights. If you don’t already have one, consider installing a programmable or smart thermostat. You’ll be able to have more precise control over the temperature in your home, and even schedule temperature changes based on your daily schedule.

When you’re using your washing machine, opt to use cold water instead of hot. Most of the time, cold water cleans just as well as hot water does, without having to worry about shrinking. When your clothes are out of the washer, try drying them the old-fashioned way with air drying. Line drying is perfect for bulkier items like towels, sheets, and blankets. Another way you can save energy is by letting your dishes air dry rather than using the heated dry setting on your dishwasher. The heated drying feature can increase your energy consumption by about 15%. Simply leave your dishes in the machine after the cycles are done and leave the door slightly open to let air in.
Much like your energy usage, you might not realize how much water you use every day until you see your monthly bill. Check your faucets for leaks or drips and get them repaired. A dripping faucet may seem inconsequential, but a continuously running one builds up fast. It’s also good practice to have your plumbing inspected every two years; keeping on this schedule will help address any issues before they become serious. Another way you can save water is to not prewash your dishes. If doing so is the only way to get your plates sparkling, troubleshoot your dishwasher to help it operate better in the long run—it’ll save you time and water. Also, make sure your hygiene habits aren’t contributing to water waste, such as leaving water running while you brush your teeth or excessively long showers.
When you’re ready to replace or upgrade the appliances and features in your home, consider investing in a more sustainable version. Today, there are many top-rated windows, refrigerators, dishwashers, and ovens that are optimized for energy saving. Going with a greener option can pay off when you see how much you’re saving on utilities. Be sure to do your research beforehand to see which models are right for you.
If you’re still throwing out your kitchen scraps, you’re missing out on the joys of composting! Starting a compost pile is a low maintenance way to get rid of your food waste and create richer soil for your garden. Some things you can compost include produce scraps, eggshells, coffee grounds, shredded paper, and yard waste. As you add these leftovers to your compost bin, be sure to mix and turn everything frequently to encourage decomposition. It will take several months before your compost is ready for use, but it’s a casual way to give back to nature.
Gardening has a myriad of benefits: it adds curb appeal to your home, it’s relaxing, and it benefits the environment. Adding beauty and personality to your yard is one of the perks of being a homeowner. You can grow a flower bed, a vegetable garden, or even a new tree to give your garden flair. Whenever possible, plant native species in your yard to enhance the ecology. Growing more plant life boosts oxygen levels to create cleaner air—it’s a win-win for everyone!

You’ve probably heard the 3 R’s before, but how often do you do all three, and in that order? If you jump straight to recycling, that’s a great step to being more eco-conscious, but don’t stop there! Start by being more aware of what, how much, and how often you buy things. Chances are, there are probably several areas in your life that don’t require frequent replenishing. By reducing your consumption habits, you can minimize your carbon footprint.
Before you throw your old things in the garbage, ask yourself if it can serve a new purpose. Turn worn clothing into cleaning rags, dated papers into scrap paper, or a faded dresser into an upcycled conversation piece—feel free to get creative! Additionally, consider donating your gently used items to charity. Donating your possessions will give them a new life cycle and make your home a little less cluttered. When you can no longer find a second (or even third!) use for something, then you can recycle. Papers and aluminum are usually recyclable, as are some plastics. Check with your local recycling center to see what items can be accepted.
Maintaining the quality of your home is necessary to protect its value and preserve it for the next family who will own it, and the same goes for the earth. When we do what we can to care for the planet, we ensure that there will be something for the next generation to look forward to.
If you have any questions about the home buying process, contact one of our licensed Mortgage Loan Originators. If you are ready to begin the home buying process, click here to get started!
Lorem ipsum dolor sit amet, consetetur sadipscing elitr, sed diam nonumy eirmod tempor invidunt ut labore et dolore magna aliquyam erat, sed diam voluptua. At vero eos et accusam et justo duo dolores et ea rebum. Stet clita kasd gubergren, no sea takimata sanctus est Lorem ipsum dolor sit amet. Lorem ipsum dolor sit amet, consetetur sadipscing elitr, sed diam nonumy eirmod tempor invidunt ut labore et dolore magna aliquyam erat, sed diam voluptua. At vero eos et accusam et justo duo dolores et ea rebum. Stet clita kasd gubergren, no sea takimata sanctus est Lorem ipsum dolor sit amet. Lorem ipsum dolor sit amet, consetetur sadipscing elitr, sed diam nonumy eirmod tempor invidunt ut labore et dolore magna aliquyam erat, sed diam voluptua. At vero eos et accusam et justo duo dolores et ea rebum. Stet clita kasd gubergren, no sea takimata sanctus est Lorem ipsum dolor sit amet.
Duis autem vel eum iriure dolor in hendrerit in vulputate velit esse molestie consequat, vel illum dolore eu feugiat nulla facilisis at vero eros et accumsan et iusto odio dignissim qui blandit praesent luptatum zzril delenit augue duis dolore te feugait nulla facilisi. Lorem ipsum dolor sit amet, consectetuer adipiscing elit, sed diam nonummy nibh euismod tincidunt ut laoreet dolore magna aliquam erat volutpat.